The headline specification tells only part of the story with Factory Reset LiftMaster Garage Door Opener; the version and the way it is used often matter more than the label on the front.
A factory reset on a LiftMaster garage door opener completely erases all programmed remotes, keypads, vehicles, and wireless settings. This process restores the opener to its original factory state and is usually required when troubleshooting persistent issues, moving into a new home, or improving security after losing a remote.
This guide focuses only on factory reset. If you only need to reprogram a remote or keypad, that is a different procedure and should not be confused with a full reset.
- Reset or Reprogram? Choose First
- What a Factory Reset Actually Does
- Factory Reset vs Regular Reset – Key Difference
- Follow the Controls, Not the Guesswork
- When You Should Factory Reset a LiftMaster Opener
- How to Factory Reset a LiftMaster Garage Door Opener
- Step-by-Step Factory Reset Instructions
- Factory Reset After a Power Outage
- Important Safety Notes
- What to Do Next
- What Successful Pairing Looks Like
- What Must Be Reinitialized
- The Learn Button Will Not Reset
- The LED Never Turns Off
- Opener Still Works With Old Remote
- Author
Reset or Reprogram? Choose First
What a Factory Reset Actually Does
Before starting, it is important to understand what will be erased.
After the reset, the opener will not respond to any remote until everything is reprogrammed.
Factory Reset vs Regular Reset – Key Difference
This is a common source of confusion.
If your goal is security or a clean setup, factory reset is the correct choice.
Follow the Controls, Not the Guesswork
When You Should Factory Reset a LiftMaster Opener
A factory reset is recommended if you are experiencing one or more of the following:
- You bought a house with an existing LiftMaster opener
- A remote or keypad was lost or stolen
- The opener will not accept new remotes
- Programming keeps failing after multiple attempts
- The system behaves unpredictably after a power surge
- You want to erase all stored devices at once
If your opener works normally and you just want to add a remote, do not factory reset.
How to Factory Reset a LiftMaster Garage Door Opener
This method works for most LiftMaster models with a Learn button.
Step-by-Step Factory Reset Instructions
- Make sure the garage door is fully closed.
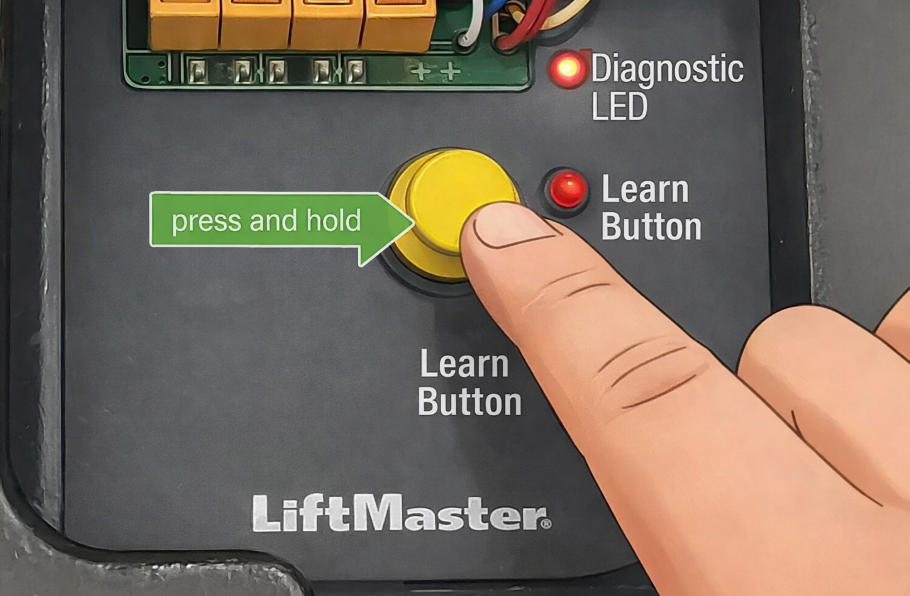
- Locate the Learn button on the opener motor housing.
- Usually found behind the light cover.
- Colors may vary (yellow, purple, red, or green).
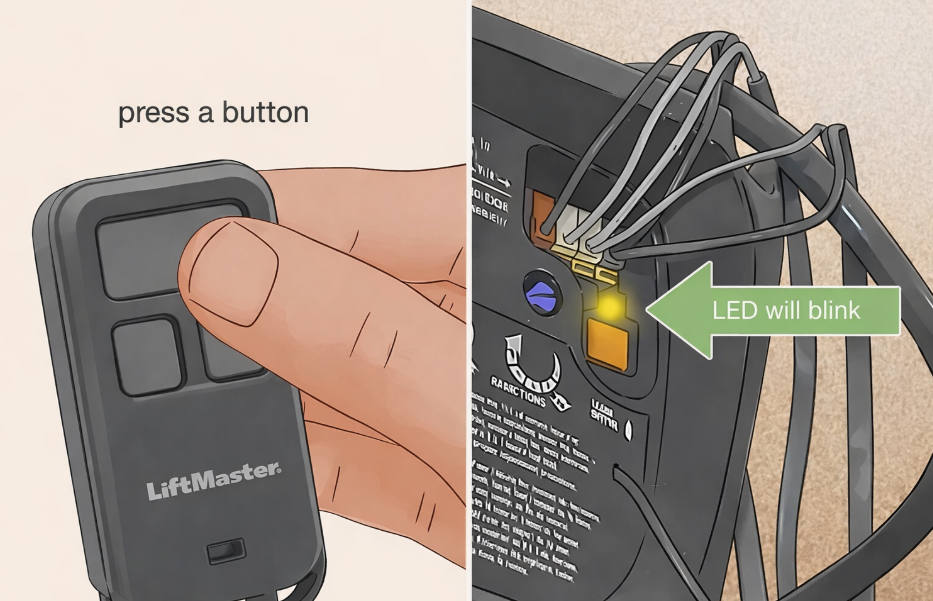
- Press and hold the Learn button.
- Continue holding for 6–10 seconds.
- Release the button only when the LED turns off.
At this point, the factory reset is complete.
Factory Reset After a Power Outage
A power outage does not automatically require a factory reset.
Only perform a factory reset after a power outage if:
- The opener will not accept new programming
- The Learn button does not respond
- Remotes intermittently stop working
In most cases, a simple reprogram is enough.
Important Safety Notes
- A factory reset removes all access devices
- You must reprogram remotes and keypads after resetting
- Do not factory reset unless necessary – it adds extra setup time
What to Do Next
After a factory reset, you will need to:
- Reprogram LiftMaster remotes
- Reprogram keypad PIN codes
- Reconnect vehicles
- Reconfigure WiFi or myQ (if applicable)
Each of these steps deserves its own dedicated guide, and we will handle them separately to keep everything clear and effective.
What Successful Pairing Looks Like
After performing the reset:
- Press any previously programmed remote – the door should not respond
- Enter the old keypad code – nothing should happen
- Vehicle buttons should no longer activate the door
If the opener still responds, repeat the process and hold the Learn button slightly longer.
What Must Be Reinitialized
The Learn Button Will Not Reset
- Hold the button longer (up to 15 seconds)
- Make sure you are pressing the correct button
- Remove power for 60 seconds, then try again
The LED Never Turns Off
- Some older models require holding the button until the light blinks several times
- If unsure, repeat the process twice
Opener Still Works With Old Remote
- Reset was not completed
- Repeat the procedure slowly and deliberately
If Factory Reset LiftMaster Garage Door Opener still behaves the same after the matching test and a known-good power source, stop repeating the replacement and diagnose the device or receiver instead.
