Before changing anything on How to Set Time on an Armitron Watch, identify the exact version and note the current control positions or battery polarity.
Armitron watches are known for being reliable, affordable, and easy to use. Many models are digital sports watches, while others combine analog hands with a digital display. Because of this variety, the exact steps to set the time on an Armitron watch may differ slightly depending on the model.
In most cases, the process involves entering the time setting mode, adjusting the numbers using the side buttons, and confirming the changes.
This guide explains how to set the time on an Armitron watch, including digital models, Armitron Pro Sport watches, and hybrid analog-digital models.
- Buttons, Crown, or Touchscreen?
- How to Set Time on an Armitron Digital Watch
- Step 1 – Enter Time Setting Mode
- Step 2 – Adjust the Seconds
- Step 3 – Set the Hour
- Step 4 – Set the Minutes
- Step 5 – Save the Settings
- How to Set Time on an Armitron Pro Sport Watch
- Armitron Watch Button Functions
- Quick Tips for Armitron Watch Owners
- Do the Job in This Order
- Steps
- Handle the Secondary Settings Separately
- When Power Returns but the Device Does Not
- The numbers do not flash
- The watch shows AM or PM incorrectly
- Buttons do not respond
- Author
Buttons, Crown, or Touchscreen?
How to Set Time on an Armitron Digital Watch
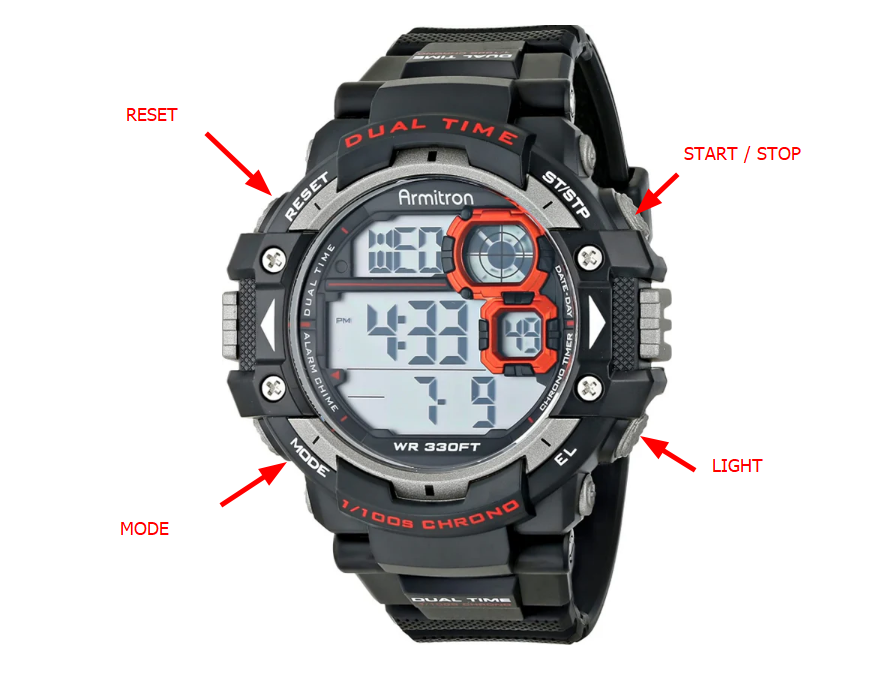
Most Armitron digital watches have four buttons located around the case.
These buttons are usually labeled:
- MODE
- RESET
- START
- LIGHT
The labels may vary slightly depending on the model.
Step 1 – Enter Time Setting Mode
Press and hold the RESET button for about 2 seconds until the seconds start flashing on the screen.
Flashing numbers indicate that the watch has entered time adjustment mode.
Step 2 – Adjust the Seconds
Press the START button to reset the seconds to zero.
This step helps synchronize the watch with the current minute.
Step 3 – Set the Hour
Press the MODE button once.
The hour digits will begin flashing.
Press the START button repeatedly until the correct hour appears.
Step 4 – Set the Minutes
Press the MODE button again to move to minutes.
Use the START button to adjust the minutes until the correct time appears.
Step 5 – Save the Settings
Press the RESET button again to confirm the settings and return to the normal time display.
Your Armitron watch should now display the correct time.
How to Set Time on an Armitron Pro Sport Watch
Armitron Pro Sport watches use a similar button layout but may include additional features like a stopwatch, alarm, and backlight.
To set the time:
- Press MODE until the time display appears
- Hold the RESET button until the digits begin blinking
- Press MODE to switch between hours and minutes
- Use START to change the numbers
- Press RESET again to save the time
This method works for most Armitron Pro Sport digital watches.
Armitron Watch Button Functions
Most Armitron watches follow the same basic button layout.
Understanding these buttons makes it much easier to adjust the time.
Quick Tips for Armitron Watch Owners
- Always exit setting mode after adjusting time
- Avoid pressing multiple buttons underwater
- Replace the battery if the display becomes dim
- Keep the watch clean to ensure the buttons work properly
Do the Job in This Order
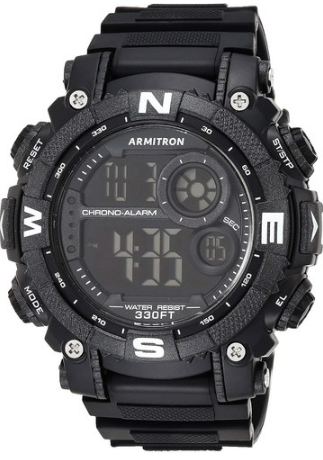
Many Armitron sport watches include the WR330FT water resistance rating.
The time setting steps are usually identical to other digital models.
Steps
- Hold the RESET button until numbers flash
- Press MODE to move between seconds, hour, and minutes
- Press START to adjust the values
- Press RESET again to confirm
Handle the Secondary Settings Separately
Some Armitron watches also allow you to adjust the date and day of the week.
After entering the time setting mode, press MODE to cycle through:
- Seconds
- Hour
- Minutes
- Month
- Date
- Day of week
Use the START button to change the numbers.
Press RESET to save the settings.
When Power Returns but the Device Does Not
The numbers do not flash
Make sure you hold the RESET button long enough to enter the setting mode.
The watch shows AM or PM incorrectly
The watch is using 12-hour format. Continue pressing the hour button until the correct period appears.
Buttons do not respond
The watch may be in stopwatch or alarm mode. Press MODE until the normal time screen appears.
Stop work on How to Set Time on an Armitron Watch if the next check requires live electrical access, defeated safety equipment, forced covers, or an unverified wiring change.